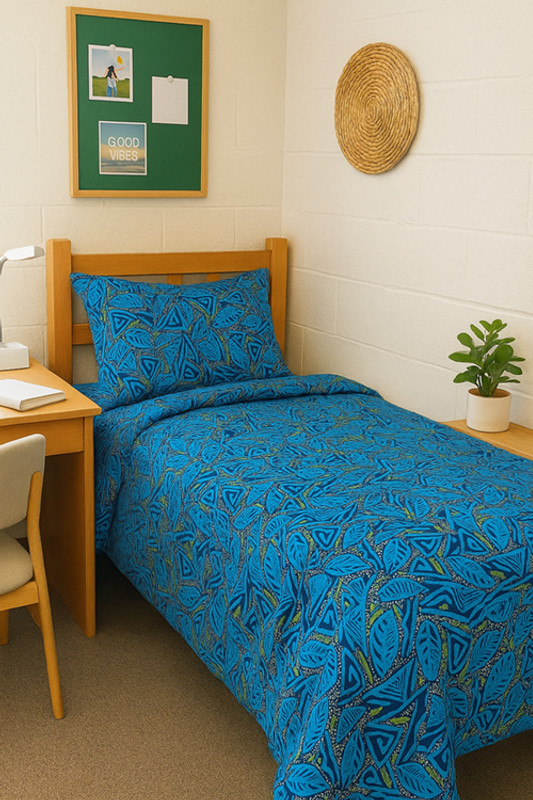
How to Sew a Custom XL Twin Duvet Cover
Published by NannetteD on 18th Jul 2025
Heading off to college? Create custom bedding with bold prints, durable seams, and a personal touch. This step-by-step tutorial shows you how to sew your own duvet cover with French seams and seamless pattern matching—perfect for XL Twin beds and beyond. Whether you're decorating a dorm or gifting handmade bedding, this project is as stylish as it is practical.
Duvet Cover Sizing & Fabric Requirements
| Bed Size | Finished Size (inches) | Fabric Needed* | Notes |
|---|---|---|---|
| XL Twin | 68" x 92" | 6 yds (54" wide) | Standard dorm size |
| Twin | 68" x 86" | 5.5 yds | Slightly shorter |
| Full/Queen | 88" x 92" | 7.5 yds | Split backing recommended |
| King | 104" x 92" | 9 yds | Split backing required |
*Fabric allowance includes extra for French seams and pattern matching.
Pre-washing fabrics printed by The Textile District is not necessary! Our printing process locks the color deep within the fibers and creates soft, vibrant, colorfast fabric by the yard that is ready to sew and enjoy!
If sewing with fabrics from other sources, it is best to wash before cutting for best results.
Supplies Needed
- Custom-printed cotton, linen, or sateen fabric (54"+ width)
- Coordinating thread
- Rotary cutter or scissors
- Measuring tape and pins or clips
- Sewing machine
- Optional: Buttons or snaps for closure (6–10)
Cutting Instructions (XL Twin)
- Front Panel: Cut 1 piece 70” x 94”
- Back Panel: Cut 2 pieces 36” x 94” (for envelope-style closure)
For large prints or directional designs, align motifs across panels before cutting for seamless pattern matching.
Step-by-Step Sewing Instructions
1. Match the Pattern
Lay out the front and back panels right side up. Align design motifs along seam edges and trim if necessary. Use tape or pins to mark key alignment points to keep patterns consistent at the seams.
2. Hem Back Panel Openings
On each back panel, turn under one long edge by ½”, then again by 1” to create a clean double-fold hem. Press well and topstitch close to the inner fold for a polished finish.
3. Assemble the Back Panel
Overlap the two hemmed back panels by 4–6 inches to form the envelope enclosure. The overlap should be centered and evenly distributed. Baste along the top and bottom edges within the seam allowance to keep layers from shifting during assembly.
4. Sew with French Seams
- Place the front and back panels wrong sides together.
- Stitch around all four sides with a ⅜” seam allowance.
- Trim seam allowances to ⅛”, press seams flat, and turn the duvet cover inside out, so right sides are now together.
- Stitch again around all four sides with a ¼” seam, fully enclosing the raw edges.
Note: It’s important that the back overlap (envelope opening) is inside during this step, and the basting holds it securely in place.
French seams create a durable, professional finish—perfect for bedding that gets frequent washes.
5. Add Closures
Attach buttons, snaps, or ties along the inner edge of the envelope opening to secure the duvet insert. Space closures about 6–8 inches apart to keep the insert evenly in place.
Care Instructions – Wash, Wear, Repeat
The Textile District fabrics are printed using eco-friendly, OEKOTEX® certified reactive dyes that bond at the fiber level—ensuring vivid color, a soft hand, and long-lasting durability.
- Machine wash cold with mild detergent
- Tumble dry low or line dry
- Iron on cotton setting as needed (print side down)
- Avoid bleach or fabric softeners
These fabrics are made to handle college life—colors stay bright and seams stay strong, wash after wash.
Ready to start sewing? Browse our artist-designed and custom fabric options for your next dorm-ready project at TheTextileDistrict.com.
The fabric design featured in this post is Calypso in Ocean colorway. It is available in four colorways.

