
Creative Napkin Folding for Stunning Holiday Table Decor
Published by NannetteD on Sep 25th 2023
The holidays are a time for gathering, expressing gratitude, and savoring delicious meals with loved ones. As we prepare to set our tables for each cherished holiday, why not add an extra touch of elegance and creativity to your décor? In this blog post, we'll show you how to transform simple cloth napkins into stunning holders for small flower bouquets, adding a special and memorable flourish to elevate your dining room decor.
This delightful napkin folding technique not only brings a burst of nature's beauty to your table but also serves as a thoughtful and personalized gesture for your guests! We had originally planned to use decorative napkin rings, but when we realized that our two beautiful (and very large) floral centerpieces would be more of a "floral hedge" dividing the dining room table than a festive accent, we skipped the traditional centerpiece approach and improvised.
We hope you give this simple folding technique a try, and share this blog post with friends and family as a quick and easy way to enhance your table settings this holiday season.
Let's get started!
Easy Napkin Folding Technique for Every Holiday or Occasion
The table runner shown in this tutorial were made in fabrics custom printed in the Artistic Watercolor design by Monica Kapur.
Step 1: Lay an unfolded dinner napkin flat in front of you with the right side facing down.
Fold the napkin in quarters, and lightly press with your fingers along the folded edges to make a light crease (this will help guide fold placement in the next steps).
Open the napkin so that it again lays flat in front of you with the right side facing down.
Step 2: Fold the lower left corner inward to approximately 1.5 inches from the center point:

Step 3: Repeat in the upper right corner, folding inward approximately half way to the center point:

Step 4: Now, fold the napkin in half vertically, aligning the left and right sides or your napkin:

Step 5: Fold the lower corner towards center approximately half way to center point.

Step 6: Fold the napkin up in half vertically.

Step 7: Flip the napkin over horizontally so that folds shown above are facing the table.

Step 8: Then, fold two thirds over from right to left so that the folded "pockets" are centered and facing you.

Step 9: Fold back the last third of the napkin to the back to finish folding. Repeat.

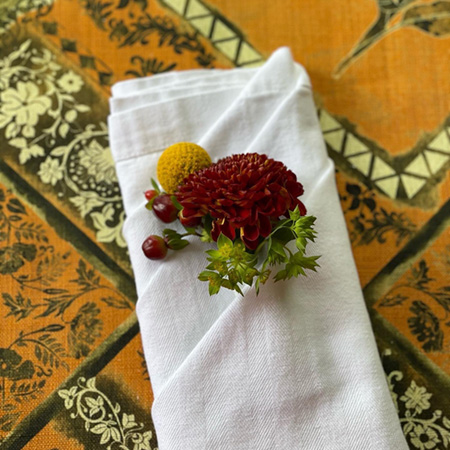
How to Create Mini Floral Bouquets

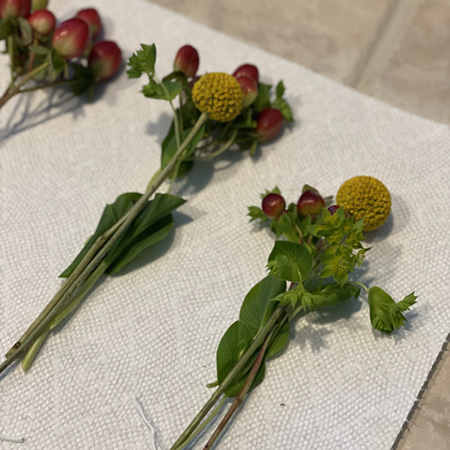
Step 1: Prep Your Flowers
I chose two large assortments with a mix of large and small seasonal flowers and botanical accents. I trimmed the stems and popped them in a sink full of water to keep them hydrated while I selected the flowers I would use in my small bouquets.
Step 2: Build mini bundles in a mix of colors from the smaller flowers and botanical accents.
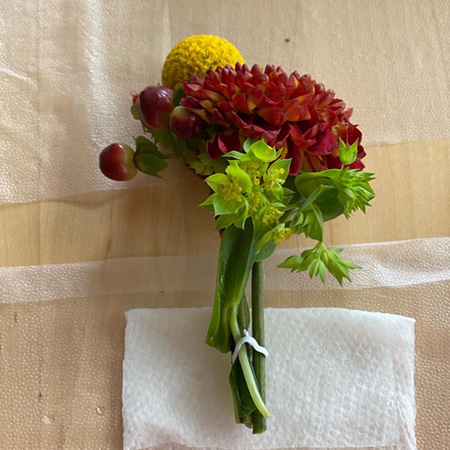
Step 3: You can loosely secure each bundle with twist ties or with string, then trim the ends and pop the bouquets in water to keep fresh.
Step 4: Wrap each bundle in a damp paper towel and enclose in plastic wrap to lock the moisture in to keep the mini flower bouquets fresh, and prevent the dampness from transferring to the folded cloth napkin when assembled.
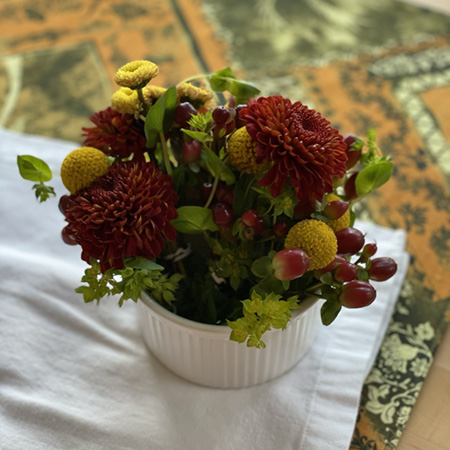
Step 5: Set Your Table and Enjoy!
Let's Talk Textiles!
Join our mailing list to stay up to date about new design arrivals, fabric updates, and much more. To thank you for joining, we'll send you a Welcome Coupon to take 15% off your first custom printed fabric order > > Sign Up Today
How To Order Custom Printed Fabrics on The Textile District:
Each image represents 27" of printed fabric and clicks through to the product page for easy ordering:
- Choose any base fabric (15+ options)
- Select the color way you wish to print (click the icon)
- Enter the quantity you need (all print by the yard)
- Add to cart to order
As always, if you have a question or need help choosing which base fabric option is best for your project at hand, we are here to help. Please send us a note or give us a call. We'd love to hear from you!
Not sure which base fabric is most suitable for your next project?
© 2024 The Textile District | Need Help? Call us on 704-814-0712
All designs are the licensed property of the featured artist.