

Sewing Reusable Drawstring Gift Bags | Free Project
Published by Nannette D. | The Textile District on Jul 11th 2025
Updated September 2026 to reflect current fabric options, corrected sizing and sewing guidance.
Reusable fabric gift bags are a practical sewing project for holidays, birthdays, housewarming gifts and everyday organization. Instead of wrapping a gift in paper, you can sew a simple drawstring bag that becomes part of the gift and can be used again for storage, travel or future gift giving.
This beginner-friendly tutorial shows you how to sew a lined-looking, neatly finished drawstring bag from two fabric rectangles, with sizing ideas for everything from small favors to shoe bags and larger storage bags.
DIY Drawstring Gift Bag
Skill level: Beginner
Construction: Two fabric rectangles with side and bottom seams plus a folded drawstring casing
Seam allowance: ¼" unless otherwise noted
Choose Fabric for a Drawstring Bag
The best fabric depends on the size of the bag and how you plan to use it.
Good options from The Textile District include:
- Cotton Quilt – lightweight, easy to sew and especially useful for smaller gift bags
- Cotton Sheeting – versatile with a little more body
- Cotton Duck – more structured for larger or heavier-duty bags
- Cotton Twill – durable with a soft diagonal weave
- Cotton Sailcloth – useful when you want additional structure
- Cotton/Linen and Linen/Cotton blends – good choices for a more textural, elevated look
For small gift bags, lighter woven fabrics are usually easiest to gather around the drawstring. Larger storage or shoe bags can benefit from a fabric with more body.
Materials You Will Need
- Fabric
- Coordinating sewing thread
- Drawstring cord, ribbon or twill tape
- Safety pin or bodkin
- Fabric scissors or rotary cutter and cutting mat
- Ruler or measuring tape
- Pins or fabric clips
- Sewing machine or hand-sewing needle
- Iron and ironing surface
Drawstring Bag Size Guide
Cut two rectangles for each bag, one for the front and one for the back.
The examples below assume a ¼" seam allowance on the sides and bottom plus a top casing that uses approximately 1¼" of fabric.
- Jewelry or favor bag: Cut two 6" × 8" rectangles for a finished size of approximately 5½" × 6½".
- Small gift bag: Cut two 8" × 12" rectangles for a finished size of approximately 7½" × 10½".
- Medium gift bag: Cut two 12" × 16" rectangles for a finished size of approximately 11½" × 14½".
- Shoe bag: Cut two 14" × 18" rectangles for a finished size of approximately 13½" × 16½".
- Large storage or laundry bag: Cut two 20" × 28" rectangles for a finished size of approximately 19½" × 26½".
These are starting points rather than fixed sizes. Measure the item you plan to place inside the bag and add enough room for ease, seam allowances and the drawstring casing.
Step 1: Cut the Fabric
Cut two matching rectangles using the dimensions that suit your project.
Before cutting, check the direction and scale of the print. If the fabric has a directional floral, stripe, plaid or large focal motif, make sure both pieces are oriented correctly.
Press the fabric if needed so the pieces lie flat and remain easy to align.
Step 2: Mark the Drawstring Casing
On both fabric pieces, measure approximately 1½" down from the top edge and mark the side edges lightly with tailor’s chalk or a removable fabric marker.
This marks the area that will remain open at the side seams so the drawstring can pass through the casing.
Step 3: Sew the Side & Bottom Seams
Place the two fabric pieces right sides together and align the edges.
- Beginning at the drawstring mark, sew down one side using a ¼" seam allowance.
- Pivot at the bottom corner and sew across the bottom.
- Pivot again and sew up the opposite side, stopping at the corresponding drawstring mark.
- Backstitch at the beginning and end of the seams.
The upper portion of each side seam remains open to create access to the drawstring casing.
For fabrics that fray readily, finish the side and bottom seam allowances with a zigzag stitch or serger.
Step 4: Finish the Drawstring Openings
Press the side seam allowances open near the top of the bag.
At each drawstring opening, fold the raw side edges inward and stitch them neatly in place. Finishing these small openings before creating the casing prevents exposed raw edges around the drawstring.
Step 5: Create the Drawstring Casing
With the bag still wrong side out, fold the top raw edge toward the wrong side approximately ¼" and press.
Fold it down again approximately 1" and press.
Stitch close to the lower folded edge around the entire top of the bag, taking care not to sew the side openings closed.
This creates the channel through which the drawstrings will travel.
Step 6: Insert the Drawstrings
For a two-cord closure, cut two pieces of cord, ribbon or twill tape. Each should be approximately 1½–2 times the width of the bag, with a little extra for tying or knotting.
Attach a safety pin or bodkin to one end of the first cord.
Thread it through one side opening, continue around the entire casing and bring it back out through the same side.
Repeat with the second cord, beginning from the opposite side.
Knot the two ends of each cord together, then pull gently from both sides to close the bag.
Add Boxed Corners for More Depth
If the bag will hold something bulky, boxed corners can create a flatter base and additional depth.
After sewing the side and bottom seams, flatten one lower corner so the side seam aligns with the bottom seam.
Measure inward from the point, mark a line perpendicular to the seam and stitch across it. Repeat on the opposite corner.
The farther you sew from the point, the deeper the finished bag will be.
Trim the excess corner fabric if desired, leaving an appropriate seam allowance.
Add a Ruffle Above the Drawstring
For a decorative ruffled top, place the drawstring casing slightly lower rather than directly beneath the upper edge.
The fabric above the casing will gather when the drawstring is pulled, creating a small ruffle.
Allow the additional height when calculating the original cut dimensions.
Ideas for Customizing Fabric Gift Bags
- Use coordinating prints for a set of differently sized bags.
- Add a fabric label or small embroidered name.
- Use contrasting ribbon or twill tape for the drawstring.
- Combine a focal print with a coordinating fabric for color blocking.
- Add boxed corners for gifts that need more depth.
- Use seasonal prints for Christmas, birthdays or other celebrations.
Why Sew Reusable Fabric Gift Bags?
A fabric drawstring bag can serve two purposes: it presents the gift and then becomes a useful storage bag after the gift is opened.
Small bags can hold jewelry, treats or handmade items. Medium bags work well for books, clothing and other gifts, while larger versions can be reused for shoes, travel organization, laundry or household storage.
Because the bag can be used repeatedly, it is a practical alternative to single-use gift wrapping.
Featured Fabric: Bellbloom
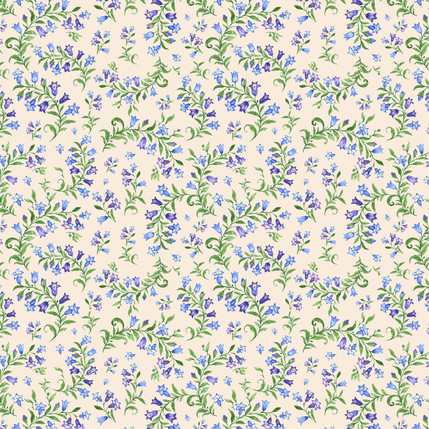
The original project featured Bellbloom, a floral design by Masha Litvinova, shown in several colorways.
Florals work beautifully for fabric gift bags, but stripes, plaids, geometrics, novelty prints and seasonal designs can be equally effective depending on the recipient and occasion.
Use Fat Quarters for Smaller Gift Bags
Fat quarters are a convenient option for smaller drawstring bags because the 18" × 21" sections provide enough usable area for many favor, jewelry and small gift-bag sizes.
The Textile District’s Fat Quarter assortments include twelve coordinated artist-designed prints on Cotton Quilt fabric and are supplied as three continuous yards for you to cut into twelve fat-quarter sections.
Find Fabric for Your Gift Bags
Browse The Textile District’s artist-designed catalog, choose your preferred design and colorway, then select the available base textile that best suits the size and structure of your bag.
Browse Artist-Designed Fabric by the Yard
If you have your own artwork, you can also print your design on a range of suitable base textiles through our custom fabric printing service.
Compare Fabric Options
A small gift bag and a large storage bag do not necessarily need the same textile. Compare fabric weight, hand, structure and recommended uses before choosing the base fabric for your project.