How to Sew a Bandana or Head Scarf | Free Project
Published by Nannette D. | The Textile District on Jun 16th 2024
Updated September 2026 to reflect current fabric options, links and sewing guidance.
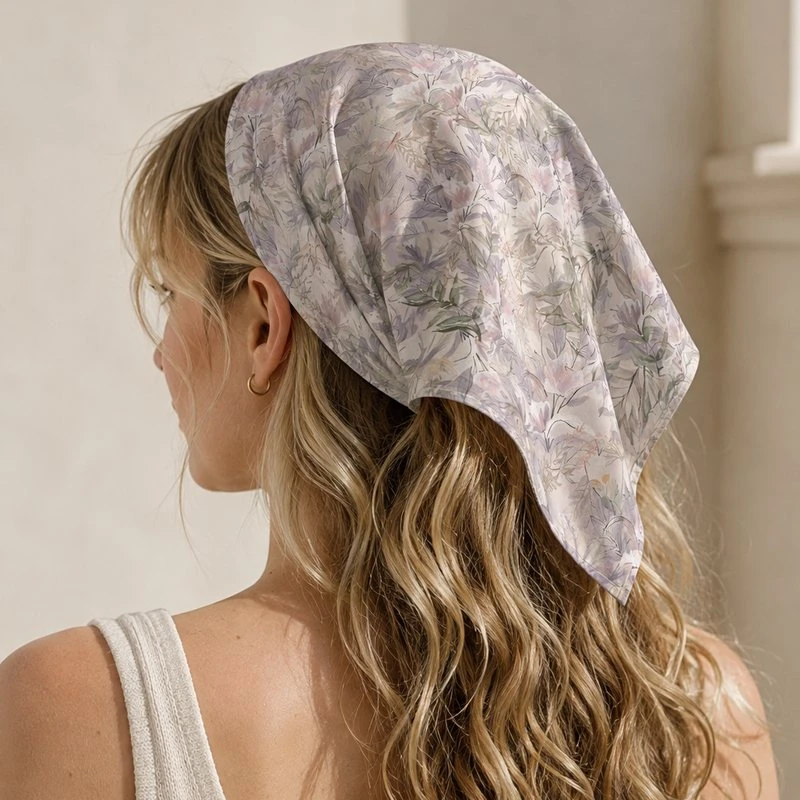
A handmade bandana or head scarf is a quick, beginner-friendly sewing project that works especially well with lightweight cotton fabrics. The finished square can be worn as a neck scarf, head covering, hair accessory or tied onto a bag for a simple pop of color and pattern.
This tutorial shows you how to sew a classic square bandana with a clean double-fold hem, plus suggested sizes for children and adults and tips for choosing a fabric with the right softness and drape.
If you are looking for a pet-specific version, see our Dog Bandana Free Sewing Project for reversible construction and sizing guidance.
DIY Bandana or Head Scarf Project
Skill level: Beginner
Estimated sewing time: Approximately 1 hour
The project uses a simple square of fabric finished with a narrow double-fold hem on all four sides.
Choose Fabric for a Bandana or Head Scarf
Lightweight, washable fabrics work best for bandanas and head scarves because they are easy to fold, tie and wear comfortably close to the skin.
Good options from The Textile District include:
- Cotton Pima Lawn – soft, lightweight and fluid, with an especially smooth hand for scarves and head coverings
- Cotton Sheeting – lightweight and versatile with a little more body
- Cotton Quilt – easy to sew and press, with a slightly crisper hand
The right choice depends on how you plan to wear the finished piece. For a softer scarf or head covering, choose a lighter fabric with more drape. For a more traditional bandana that holds its shape, a slightly crisper cotton can work well.
If you would like to compare the fabrics in hand, the Ground Fabric Swatch Kit includes samples of our current base textiles.
Materials You Will Need
- Lightweight cotton fabric
- Scissors or rotary cutter and cutting mat
- Clear ruler or measuring tape
- Pins or clips
- Sewing machine or hand-sewing needle
- Coordinating thread
- Iron and ironing surface
- Fabric marker or tailor’s chalk, optional
Bandana Size Guide
Bandanas can be made in many sizes depending on how they will be worn. The measurements below are useful starting points rather than fixed rules.
- Children, ages 3–7: approximately 18" × 18" finished
- Youth, ages 8–12: approximately 20" × 20" finished
- Adults: approximately 22" × 22" finished
- Large adult bandana: approximately 24" × 24" finished
- Loose adult head scarf: approximately 27" × 27" finished
If you plan to wrap or tie the fabric around the head, neck or hair, test the intended size with a similar piece of fabric before cutting your final yardage.
Step 1: Calculate the Cut Size
This tutorial uses a ¼" double-fold hem on each edge. That removes approximately ½" from each side of the cut square.
To achieve the finished sizes listed above, add approximately 1" to both the width and height before cutting.
For example, for an approximately 22" finished adult bandana:
Cut one 23" × 23" square.
If you prefer a wider or narrower hem, adjust the cutting dimensions accordingly.
Step 2: Cut the Fabric
Measure and mark the fabric carefully, checking that the corners remain square.
Cut the fabric using scissors or a rotary cutter and ruler.
Before cutting, look at the direction and scale of the print. If the design contains a large floral, stripe, border or directional motif, decide how you want it positioned when the bandana is folded and worn.
Step 3: Prepare the Edges
With the wrong side of the fabric facing up, fold each raw edge under ¼" and press.
Fold the edge under another ¼" and press again. The second fold encloses the raw edge and creates a clean narrow hem.
Pin or clip the folds in place as needed.
Step 4: Sew the Hem
Stitch close to the inner folded edge around all four sides.
Backstitch at the beginning and end to secure the stitching.
When you reach a corner, stop with the needle down, lift the presser foot, pivot the fabric and continue along the next side.
If you prefer hand sewing, use a small running stitch, slip stitch or blind hem stitch for a neat finish.
Step 5: Press the Finished Bandana
Give the finished bandana a final press so the hems lie flat and the corners remain crisp.
Trim any loose threads before wearing or washing.
Ways to Wear a Handmade Bandana
A simple square bandana can be worn in several ways:
- folded into a triangle and tied around the neck
- used as a head scarf or hair covering
- folded into a narrow band and worn as a headband
- tied around a ponytail or bun
- worn around the wrist
- tied onto a handbag, tote or backpack
The size and fabric weight will affect how easily the scarf folds, knots and drapes.
Choose the Right Print Scale
Print scale is especially important on smaller accessories because only part of the overall design may be visible at one time.
Small and medium repeats tend to distribute evenly across the finished piece. Larger florals or statement motifs can also work well, but you may want to position the cut so a favorite part of the design remains visible when the scarf is folded.
Stripes and directional prints should be checked carefully before cutting so the final orientation works with the way you intend to wear the piece.
Fabric Care & Sewing Preparation
The Textile District’s natural-fiber fabrics are direct printed with OEKO-TEX® certified fiber-reactive dyes, then professionally steamed, washed and dried as part of the finishing process.
No additional prewashing is required before sewing. Follow the care instructions for the specific base textile when laundering the finished bandana or scarf.
Make a Coordinating Beach Set
A lightweight head scarf can also be paired with a handmade cover-up or kaftan for a coordinated summer set.
Cotton Pima Lawn works especially well for this because of its soft hand and fluid drape.
Next Project: DIY Beach Kaftan Sewing Pattern in Cotton Pima Lawn
Find Fabric for Your Bandana or Scarf
Browse artist-designed florals, geometrics, stripes, abstracts and other prints, choose your preferred colorway, then select an available lightweight cotton base fabric that suits the way you want the finished scarf to feel and drape.
Browse Artist-Designed Fabric by the Yard
If you have your own artwork, you can also print your design on Cotton Pima Lawn, Cotton Sheeting and other available base textiles.
Compare Lightweight Cotton Fabrics
Bandanas and head scarves can feel very different depending on the textile underneath the print. Compare weight, hand, drape, printable width and recommended uses before choosing the fabric for your project.