
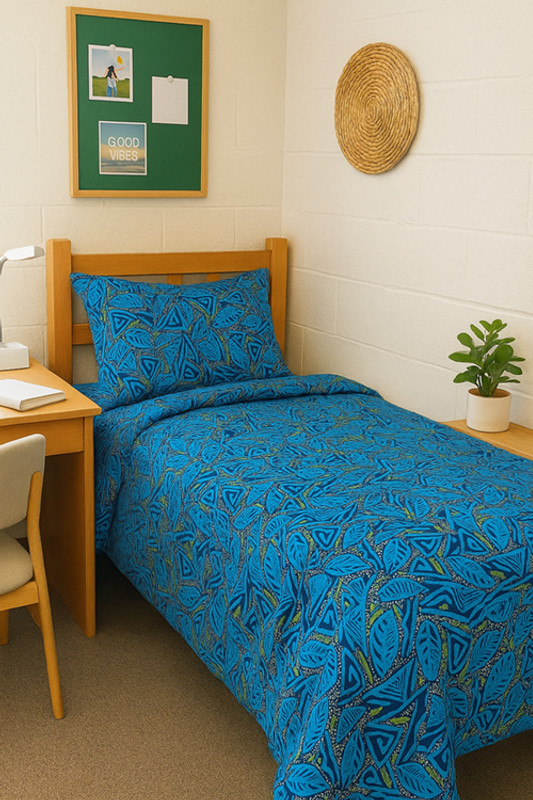
How to Sew an XL Twin Duvet Cover with Envelope Back
Published by Nannette D. | The Textile District on Jun 18th 2025
Updated September 2026 to reflect corrected measurements, current fabric options and sewing guidance.
Sewing your own duvet cover gives you control over the fabric, print scale, finished size and construction in a way ready-made bedding rarely does. An envelope-style back eliminates the need for a long zipper, while French seams create a clean interior finish that stands up well to regular laundering.
This tutorial explains the basic construction using a Twin XL duvet cover measuring approximately 68" × 92" as the worked example. The same method can be adapted to other duvet sizes by adjusting the panel dimensions to fit your insert.
If you are specifically planning bedding for a college dorm, see our newer guide: How to Sew a Twin XL Duvet Cover & Pillowcase for a Dorm.
Measure Your Duvet Insert First
Duvet and comforter dimensions can vary by manufacturer, even when they carry the same bed-size label. Before cutting fabric, measure the actual insert you plan to use.
The example in this tutorial is designed for a finished duvet cover of approximately:
68" wide × 92" long
The cutting dimensions below include seam allowances and an overlapping envelope opening on the back.
Fabric Needed for the Twin XL Example
For 54" printable-width fabric, plan on approximately 8 yards.
This layout uses the fabric efficiently:
- one full-width length for the front center panel
- two additional lengths for the back panels
- the narrow front side panels can be cut from the unused width beside the back panels
Directional designs, large-scale repeats or prints that need to align across seams may require additional yardage.
Always check the printable width of the base textile you select before ordering.
Choose Fabric for a Duvet Cover
Bedding fabric should feel comfortable, launder well and have enough body to handle repeated use without becoming unnecessarily heavy.
Depending on the hand and appearance you want, suitable options from The Textile District may include:
- Cotton Sheeting – versatile and well suited to everyday bedding
- Cotton Sateen – smooth with a polished printed surface
- Cotton/Linen 90/10 – adds subtle woven texture
- Linen/Cotton 55/45 – more textural for a relaxed bedding look
The Textile District’s natural-fiber fabrics are direct printed with OEKO-TEX® certified fiber-reactive dyes, then professionally steamed, washed and dried as part of the finishing process. No additional prewashing is required before sewing.
Supplies
- Approximately 8 yards of 54"-wide fabric for the Twin XL example
- Coordinating thread
- Sewing machine
- Rotary cutter or fabric scissors
- Measuring tape and ruler
- Pins or clips
- Iron and ironing surface
- Optional snaps, buttons or twill-tape ties for additional closure security
Cutting Instructions for a 68" × 92" Twin XL Duvet Cover
Front center panel:
Cut 1 piece 54" × 93".
Front side panels:
Cut 2 pieces 8½" × 93".
Back panels:
Cut 2 pieces 39" × 93".
The two narrow front side panels can be cut from the unused fabric width beside the two 39"-wide back panels when working with 54"-wide fabric.
Before cutting, check the orientation of directional prints, stripes and large motifs. All panels should run in the same direction unless your design intentionally calls for something different.
Step 1: Assemble the Duvet Front
Place one 8½" side panel along each long edge of the 54" center panel with right sides together.
Sew each seam using a ½" seam allowance.
The assembled front will measure approximately 69" wide before the outer seams are sewn.
Press the panel seams open or to one side.
Step 2: Check Pattern Placement
Lay the assembled front out flat and inspect the design before continuing.
For a large-scale or directional print, look at how motifs move across the two front seams. Depending on the design, you may want to pattern-match the side panels or simply position them so the overall composition looks balanced.
Stripes and geometric repeats generally benefit from more precise alignment than loose painterly or organic prints.
Step 3: Hem the Back Opening
On one long edge of each 39" back panel, fold the raw edge toward the wrong side ½" and press.
Fold it another 1" and press again.
Topstitch close to the inner folded edge.
These two clean finished edges will overlap to form the envelope opening.
Step 4: Assemble the Envelope Back
Lay the two back panels right side up with their finished edges overlapping.
Adjust the overlap until the assembled back measures approximately 69" wide, matching the assembled front.
With the dimensions above, the overlap should be approximately 6".
Pin or clip the overlap in place, then baste across the top and bottom within the seam allowance to keep the two back panels aligned during final assembly.
Step 5: Sew the Outer Edges with French Seams
French seams enclose the raw edges inside the duvet cover for a clean, durable finish.
- Place the front and assembled back wrong sides together, matching all four outer edges.
- Sew around the entire perimeter using a ¼" seam allowance.
- Trim any uneven edges or loose fibers if needed.
- Turn the duvet cover inside out so the right sides are together.
- Press the outer seams carefully.
- Sew around the perimeter again using a ¼" seam allowance.
The second seam encloses the first seam and produces an effective ½" finished seam allowance.
Step 6: Turn & Press
Turn the duvet cover right side out through the envelope opening.
Gently shape the corners and press the outer edges and envelope opening so everything lies flat.
Remove any visible basting stitches if needed.
Optional: Add Interior Duvet Ties
Small fabric or twill-tape ties sewn into the inside corners can help keep a duvet insert from shifting inside the cover.
If your duvet insert has corresponding corner loops, attach a tie securely at each inside corner before completing the outer seams.
You can also add ties at the midpoint of the long edges if the insert is particularly large or prone to shifting.
Optional: Secure the Envelope Opening
A generous overlap may be sufficient on its own, but you can add:
- small buttons and buttonholes
- snaps
- twill-tape ties
Place closures along the overlap rather than at the outer edge so they remain discreet when the bed is made.
Think About Print Scale on Large Bedding
A duvet cover provides a much larger uninterrupted surface than pillows or smaller home-décor projects, so print scale matters.
Large florals, botanicals and abstract designs have room to become a focal point on the bed. Smaller repeats create a more consistent allover appearance.
Because the front of this duvet is pieced, also consider how the repeat interacts with the panel seams before ordering and cutting.
Featured Fabric: Calypso
The original duvet project features Calypso in the Ocean colorway.
The same construction can be used with florals, geometrics, stripes, abstracts and other artist-designed prints throughout the catalog.
Browse Artist-Designed Fabric by the Yard
Fabric Care
Follow the care instructions for the specific base textile you choose.
The Textile District’s natural-fiber fabrics have already been steamed, washed and dried as part of the fiber-reactive printing and finishing process, so no additional prewashing is required before sewing.
Make Coordinating Pillowcases
Once the duvet cover is finished, use a coordinating print or the same fabric to make envelope-style pillowcases.
Next Project: How to Sew an Envelope Pillowcase
Planning a Dorm Bedding Set?
For a project focused specifically on college bedding and Twin XL sizing, including a coordinating pillowcase, continue with our dorm-bedding guide.
Read: How to Sew a Twin XL Duvet Cover & Pillowcase for a Dorm
Find Fabric for Your Duvet Cover
Choose an artist-designed print, select your preferred colorway, then choose an available base textile that provides the hand, texture and laundering performance you want for bedding.
Explore Artist-Designed Fabric
If you have your own artwork, The Textile District also offers custom fabric printing on suitable bedding textiles.