
How to Sew Custom Bedding | Free Project
Published by Nannette D. | The Textile District on Jul 23rd 2025
Updated September 2026 to reflect current fabric options, links and corrected sewing measurements.
An envelope pillowcase is a simple way to create custom bedding without buttons or zippers. The overlapping back keeps a standard pillow neatly enclosed, while the one-piece construction makes this an approachable project for confident beginners.
This tutorial shows you how to sew a standard envelope-style pillowcase from one continuous piece of fabric, with optional French seams for a clean interior finish.
DIY Envelope Pillowcase
Skill level: Beginner
Fits: Standard 20" × 26" bed pillow
Finished size: Approximately 20" × 26"
Seam allowance: ½" unless otherwise noted
Choose Fabric for a Pillowcase
For bedding, look for a fabric that feels comfortable against the skin, launders well and has enough drape to move easily around the pillow form.
Good options from The Textile District include:
- Cotton Pima Lawn – lightweight, smooth and especially soft
- Cotton Sheeting – an approachable everyday bedding weight with a little more body
- Cotton Sateen – smooth and substantial with a polished surface
- Cotton/Linen and Linen/Cotton blends – useful when you want more visible woven texture and a relaxed look
The best choice depends on the hand, weight and texture you want in the finished bedding.
If you would like to compare the textiles in hand, the Ground Fabric Swatch Kit includes samples of our current base fabrics.
Materials & Tools
- Approximately 1¾ yards of fabric, depending on printable width and pattern placement
- Coordinating thread
- Sewing machine
- Fabric scissors or rotary cutter and cutting mat
- Ruler or measuring tape
- Pins or clips
- Iron and ironing surface
Important: Check the printable width of the selected base textile before ordering. Directional prints, stripes and large repeats may require additional yardage for placement.
Step 1: Cut the Fabric
For one standard 20" × 26" envelope pillowcase, cut:
One fabric piece measuring approximately 21" × 60".
The 21" dimension includes ½" seam allowances at the top and bottom. The longer dimension provides enough fabric to wrap around the pillow and create an overlapping envelope closure.
Before cutting, check the direction and scale of the print. If you are using a large floral, stripe or directional motif, decide which section you want to appear on the front of the finished pillowcase.
Step 2: Hem the Two Short Ends
With the wrong side of the fabric facing up, fold each short edge under ½" and press.
Fold each edge under another ½" and press again.
Topstitch close to the inner folded edge to create two clean finished ends.
These hemmed edges will overlap on the back of the pillowcase to form the envelope opening.
Step 3: Fold the Envelope Pillowcase
Lay the fabric flat with the right side facing up.
Fold one hemmed short edge toward the center so approximately 26" of fabric forms the front of the pillowcase.
Fold the opposite hemmed edge over the first until the folded pillowcase measures approximately 26" across.
The two finished edges should overlap by approximately 6". This overlap forms the envelope closure.
Adjust the folds slightly if necessary so the finished width suits your pillow form and the front print placement looks balanced.
Step 4: Pin the Top & Bottom Edges
Pin or clip through all layers along the two 21" edges.
Check that the envelope overlap remains flat and aligned before sewing.
Step 5: Sew the Seams
Sew across both pinned edges using a ½" seam allowance.
Backstitch at the beginning and end of each seam.
Finish the raw edges with a zigzag stitch or serger if desired.
Optional: Use French Seams
French seams enclose the raw edges and create a particularly neat interior finish.
Instead of sewing the standard ½" seam:
- Fold the pillowcase with wrong sides together.
- Sew the top and bottom edges using a narrow ¼" seam.
- Trim the seam allowance slightly if needed.
- Turn the pillowcase so the right sides are together and press the seams flat.
- Sew the top and bottom edges again approximately ⅜" from the edge, enclosing the first seam completely.
French seams are especially useful for lightweight woven bedding fabrics because they keep the inside tidy without requiring a serger.
Step 6: Turn & Press
Turn the pillowcase right side out through the envelope opening.
Gently push out the corners, then press the entire pillowcase so the seams and overlapping back lie flat.
Step 7: Insert the Pillow
Slide the pillow through the envelope opening and work it fully into the corners.
Pull the overlapping flap back over the pillow so it remains enclosed.
No buttons, zipper or additional closure is required.
Think About Print Scale & Placement
Custom bedding gives you more control over where a printed design appears than ready-made bedding.
Small and medium repeats distribute easily across a pillowcase. Large florals, botanicals and geometrics may benefit from more deliberate placement so a favorite motif appears on the front rather than disappearing into a seam or envelope fold.
For stripes, plaids and directional designs, check the orientation before cutting.
Featured Fabric: Canopy
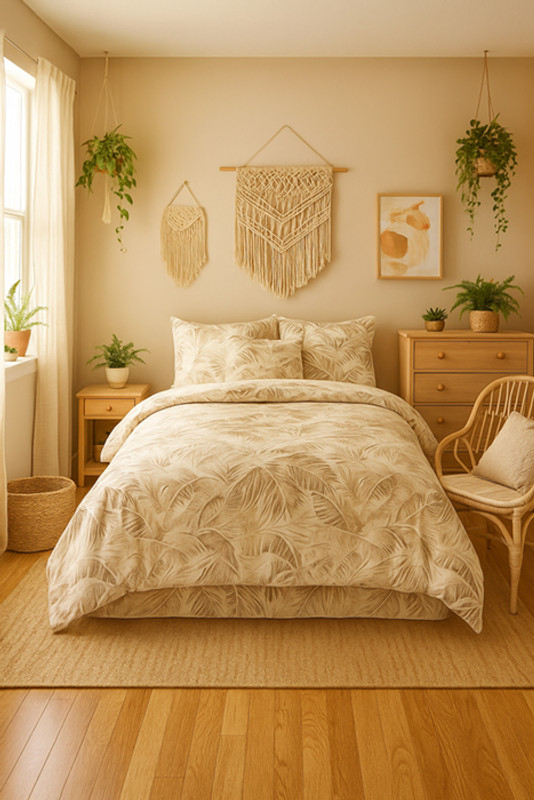
The original bedding project featured Canopy, a tropical artist-designed print available in multiple colorways.
Choose the design and colorway you like, then select the available base textile that gives your pillowcase the hand and texture you want.
Browse Artist-Designed Fabric by the Yard
Fabric Care & Sewing Preparation
The Textile District’s natural-fiber fabrics are direct printed with OEKO-TEX® certified fiber-reactive dyes, then professionally steamed, washed and dried as part of the finishing process.
No additional prewashing is required before sewing. Follow the care instructions for the specific base textile when laundering the finished pillowcase.
Make a Coordinating Duvet Cover
Once you have made a pillowcase, the same fabric can be carried into a larger bedding project.
A custom duvet cover lets you coordinate print, color and fabric across the bed without relying on a packaged bedding set.
Next Project: How to Sew a Custom Duvet Cover
Planning Twin XL Dorm Bedding?
For college bedding, our newer guide focuses specifically on Twin XL dimensions and coordinating a duvet cover and pillowcase for a dorm room.
Read: How to Sew a Twin XL Duvet Cover & Pillowcase for a Dorm
Find Fabric for Custom Bedding
Browse the artist-designed catalog, choose your preferred design and colorway, then select the available base textile that best suits your bedding project.
Explore Artist-Designed Fabric
If you have your own artwork, The Textile District also offers custom fabric printing on a range of bedding-appropriate base textiles.