

How to Sew Table Runners | Free Project
Published by Nannette D. | The Textile District on Sep 9th 2023
Updated September 2026 to reflect current fabric options, links and sewing guidance.
A handmade table runner is an easy way to introduce color, pattern and texture without changing an entire dining space. It can dress up a holiday table, add interest to an everyday setting or become a simple handmade gift.
This beginner-friendly tutorial shows you how to sew a double-fold hemmed table runner with mitered corners. The project is simple enough to finish in an afternoon, while the fabric design does most of the visual work.
If you are planning a larger table-linen project, including tablecloths or runners for weddings and events, see our companion guide: Sewing Custom Table Linens: Tablecloths & Runners.
DIY Table Runner Project
Skill level: Beginner
Estimated sewing time: Approximately 1–2 hours
The example in this tutorial begins with one yard of fabric measuring approximately 36" long by 54" wide. Dividing the width in half creates two 18" × 54" pieces before hemming.
Important: Printable width varies by base textile, so always check the specifications for the fabric you select before calculating your final runner size or yardage.
Materials You Will Need
- Fabric
- Scissors or rotary cutter and cutting mat
- Clear acrylic ruler or straightedge
- Measuring tape
- Sewing machine or hand-sewing needle
- Coordinating thread
- Iron and ironing surface
- Pins or clips
- Fabric marker or tailor’s chalk, optional
Choose Fabric for a Table Runner
A table runner usually benefits from a fabric with enough body to lie smoothly across the table while still being easy to fold, press and sew.
Cotton Duck provides a more substantial, structured feel. Cotton/Linen 90/10 combines the familiarity of cotton with some visible linen texture. Linen/cotton blends and other home-décor fabrics can create a softer, more textural look.
The print matters too. Florals can become a focal point, while stripes, plaids, geometrics and tonal designs work well as quieter layers with dishes, napkins and seasonal decorations.
If you would like to compare fabric weight, weave and texture in hand, the Ground Fabric Swatch Kit includes samples of our current base textiles.
Think About Print Direction Before Cutting
Before dividing your yard of fabric, look closely at the direction and scale of the design.
An allover or non-directional print is usually easy to position. With stripes, plaids, large florals or directional motifs, decide how you want the design to run along the finished runner before making the first cut.
For a large-scale design, you may also want to shift the cutting position slightly to feature a particular motif in the center of the runner.
Step 1: Measure & Cut the Fabric
For the example shown here, begin with a piece of fabric approximately 36" × 54". Measure 18" across the 36" dimension to divide the yard into two equal sections.
You can also fold the fabric carefully in half and lightly finger-press the fold to establish the cutting line.
Cut along the marked line to create two pieces measuring approximately 18" × 54". A clear acrylic ruler and rotary cutter are especially useful for keeping the edges straight and the corners square.
If your selected base fabric has a different printable width, adjust the runner dimensions to make efficient use of the available fabric.
Step 2: Prepare the Hems
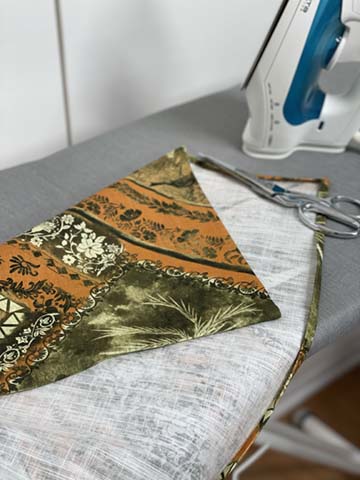
With the wrong side of the fabric facing up, fold each raw edge under ½" and press.
Fold each edge under another ½" and press again. This creates a clean double-fold hem that encloses the raw edges.
Open the pressed folds at each corner. Where the outer crease lines intersect, mark a diagonal line across the corner. This line will guide the cut for the mitered corner.
Step 3: Create Mitered Corners
Trim the corner along the marked 45-degree diagonal, taking care not to cut beyond the crease lines.
Fold the newly cut diagonal edge toward the wrong side of the fabric and press.
Refold the ½" double hems along both adjoining sides. The folded edges should meet neatly at the corner to create the miter.
Pin or clip the corner in place, then repeat the process on all four corners.
Step 4: Stitch the Hems
With the wrong side facing up, stitch close to the inner folded edge of the hem around all four sides of the runner.
Backstitch at the beginning and end to secure the seam.
When you reach a corner, stop with the needle down in the fabric, lift the presser foot, pivot the runner, lower the presser foot and continue sewing along the next side.
Repeat until all four sides are stitched.
If you prefer to sew by hand, a small blind hem stitch can create a very clean finish with minimal visible stitching on the front of the runner.
Step 5: Press the Finished Runner
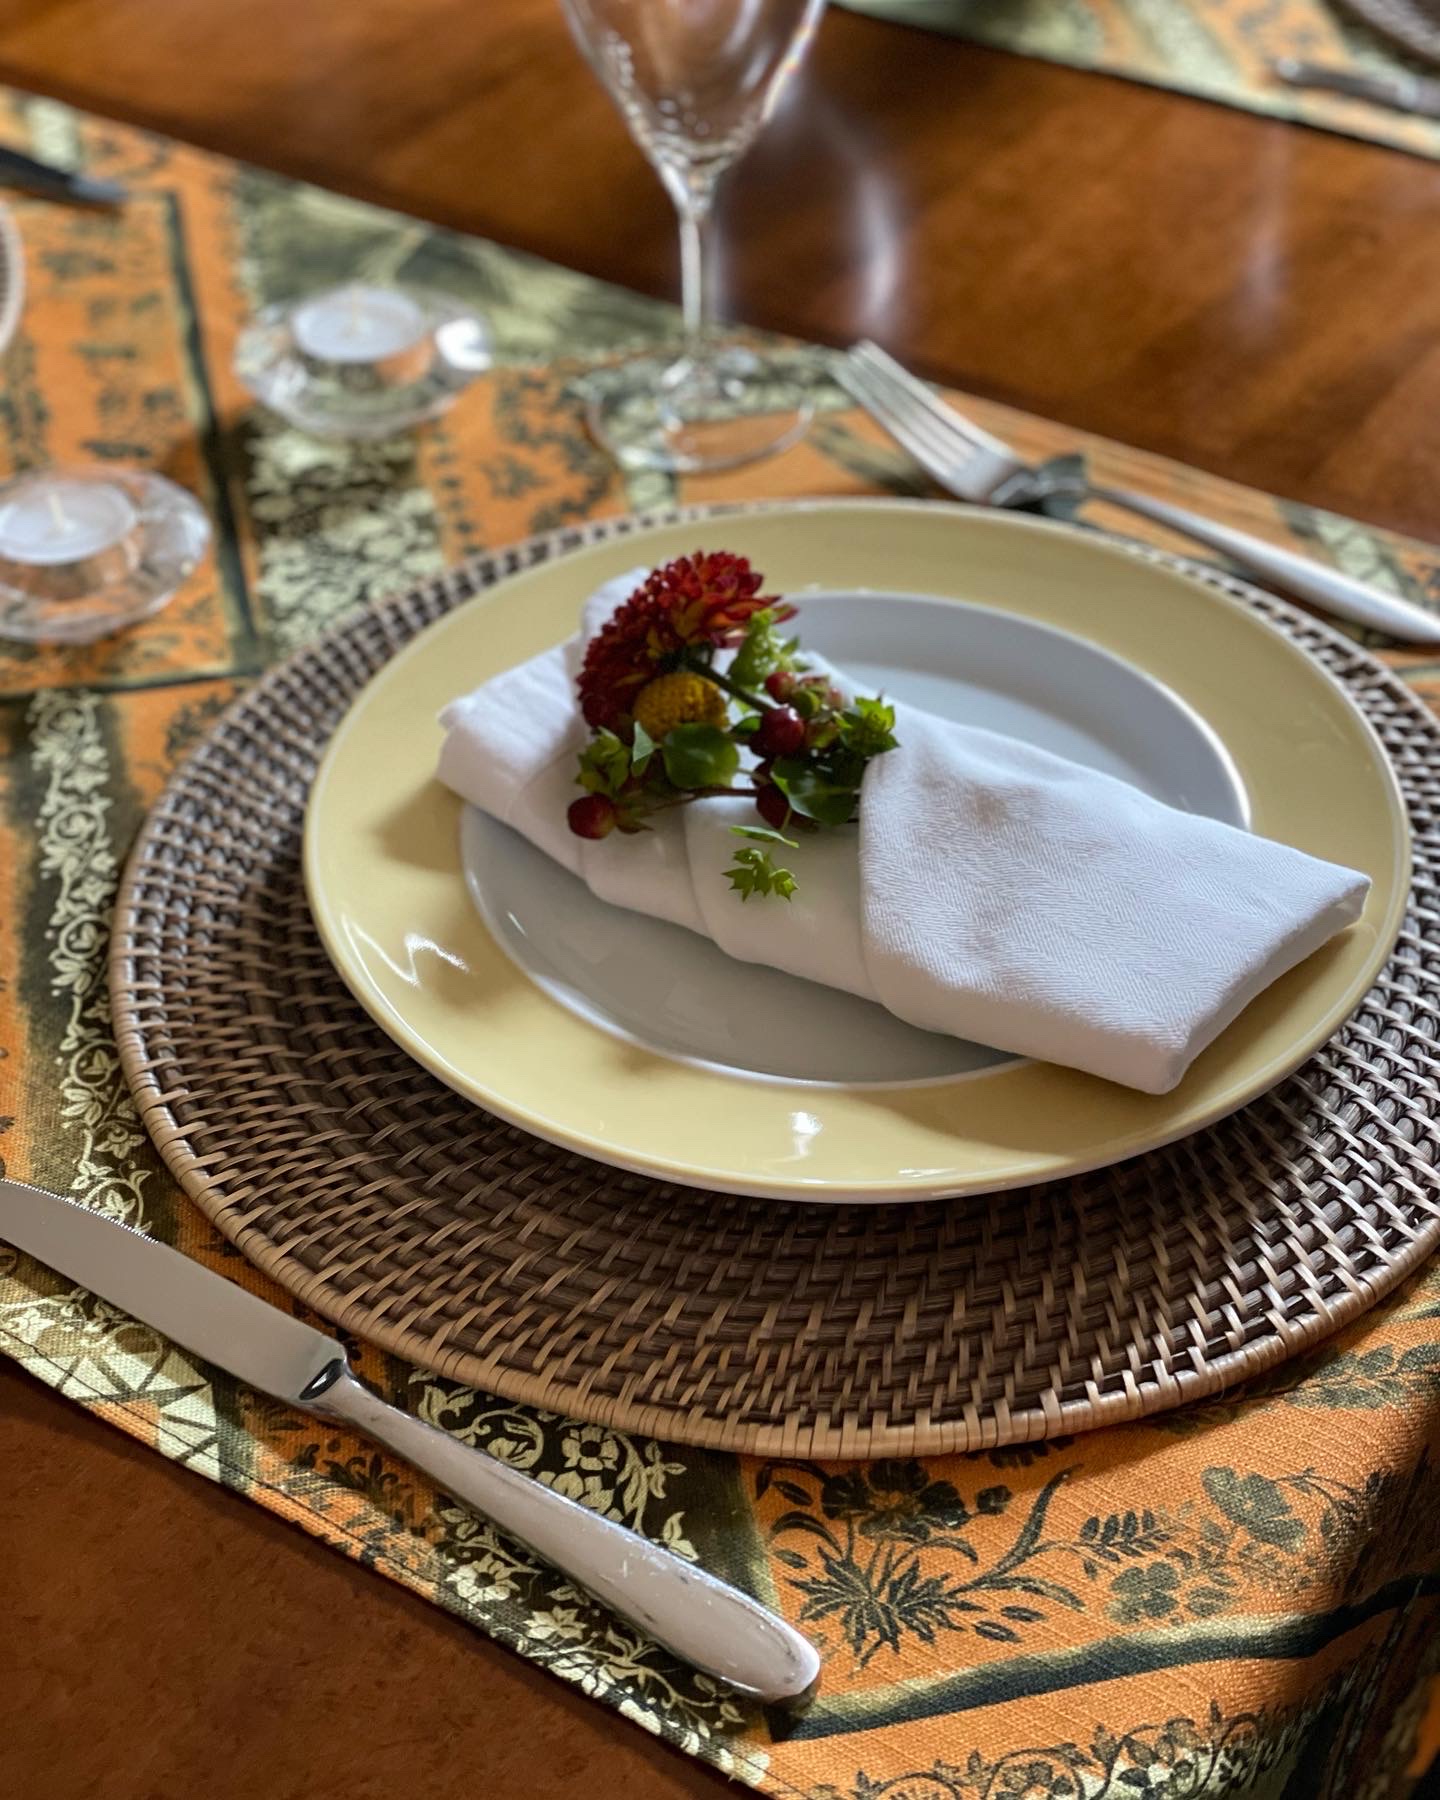
Give the finished runner a final press so the hems lie flat and the mitered corners remain crisp.
Trim any loose threads, then place the runner on the table and arrange the surrounding linens, dishes and accessories around the print.
Adjust the Size for Your Table
You do not have to use the 18" × 54" starting size shown in this tutorial.
Before cutting, measure the table and decide whether you want the runner to remain entirely on the tabletop or extend beyond each end.
For a more tailored look, keep the runner relatively narrow and let the tabletop remain visible on both sides. For a more dramatic centerpiece, use a wider runner or a print with a larger motif.
Remember to add the required hem allowance to your desired finished dimensions before cutting.
Fabric Care & Sewing Preparation
The Textile District’s natural-fiber fabrics are direct printed with OEKO-TEX® certified fiber-reactive dyes, then professionally steamed, washed and dried as part of the printing and finishing process.
That means no additional prewashing is required before sewing. Follow the care instructions for the specific base textile you choose when laundering the finished table runner.
Featured Fabric Inspiration
The original table runners shown in this project feature Artistic Watercolor by Monica Kapur.
The same project works with florals, stripes, plaids, geometrics, abstracts and printed textures throughout the artist-designed catalog.
Make Coordinating Table Linens
A table runner can also be the starting point for a coordinated set of handmade linens. Use the same fabric or mix related prints for napkins, placemats, bread-basket liners or other table accessories.
Repeating a color rather than using the exact same print throughout the setting can help the finished table feel coordinated without becoming overly matched.
Next Project: How to Sew Reversible Cloth Napkins
Find Fabric for Your Table Runner
Choose a design from The Textile District’s artist-designed catalog, select your preferred colorway, then choose the available base textile that best suits the finished look and feel you want.
Explore Artist-Designed Fabric by the Yard
If you have your own artwork, you can also print your design on our selection of base textiles for table linens, home décor and other sewn projects.
Planning More Custom Table Linens?
For help calculating dimensions, choosing fabric and planning tablecloths or runners for larger tables, weddings and events, continue with our broader table-linen guide.